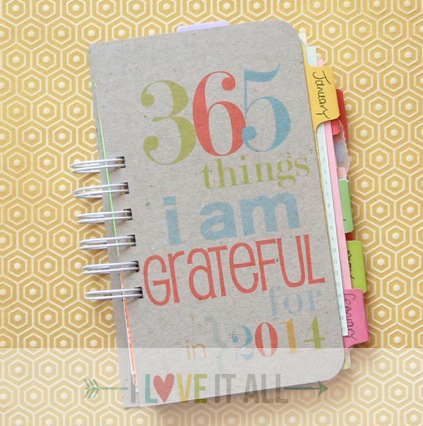
The Bind-It-All is one of my most used tools. I use it so much that the first one I purchased is my Plan B option and I use a newer model for my everyday go-to. You won't be disappointed by the versatility of the BIA, especially if you enjoy making mini albums as much as I do.
Or own an Etsy shop!
TUTORIAL
step one
Place the back cover on top of the front cover…this shows the inside back cover, that's just the way you want it.
step two
Place back cover {in front} and front cover {in back} inside your BIA and punch where desired.
step three
Remove covers from BIA and place your o-wires as shown in photo, inserting smooth rounded wires into the punched holes first.
step four
Flip whole booklet around, so that now, the inside back cover is resting on your work surface and the front cover is now on top. You should see the inside front cover staring at you when it is flat.
step five
Begin building your fabulous Gratitude Journal mini album, or buy one ready made from my shop. Be sure to place your pages face down on the left as you create.
step six
You're at the end and now it's time to close the o-wire.
step seven
Choose the profile for the size o-wire you are using. The covers should be hugging the side farthest away from you and the last page you inserted into your mini album should be facing you now. The black support bracket in back needs to be extended all the way. In one quick motion, push the handle lever back to tighten the coils. The swifter, the better, do not go in slow motion.
step eight
Your coils are joined. Your album is bound. When you flip your cover over, the binding will be on the inside back cover of your Journal, not showing on the outside.
step nine
You're so crafty! Congratulations, you are the proud owner of a gorgeous mini album.
READY MADE JOURNALS
Find the more Gratitude Journals in my shop.
Feeling crafty? I also have a DIY Gratitude Journal with a collection of papers and covers allowing you to make your own custom journal.
And here are even more mini books you're going to love and crafting supplies to make your own.


How neat! I'm a school teacher and we have something similiar here, but it binds the full length of the page...I like how this is in the middle! Thanks for sharing!
ReplyDeleteThe BIA can also do full length, up to 12" I believe, but I just choose to use 6 rings at a time, mostly. It's easier, since it punches 6 holes at a time and I don't have to line anything up this way!
DeleteFabulous tutorial! I'd love to make some of these for my fellow teachers!!!
ReplyDeleteOh, what a great idea Angi!
DeleteI just bought one for my birthday two weeks ago. Haven't used it yet but have big plans for it for Christmas gifts!
ReplyDeleteYou're going to love using your Bind-It-All once you get the hang of it and will want to bind everything!
DeleteMy bind it all is sitting here collecting dust, lol. Thanks for the tutorial and the inspiration. I love your book!
ReplyDeleteThe TurboTax Login page is a great way to file your taxes quickly and easily. The TurboTax Login page is going to be your first step to a stress-free tax season. The portal allows you to quickly and easily set up your tax return, get personalized help with any questions, can even get a free e-file. Just head over to the page, scroll down and click create an account. Once you are done with the account creation, answer a few simple questions, and you will be good.
ReplyDelete