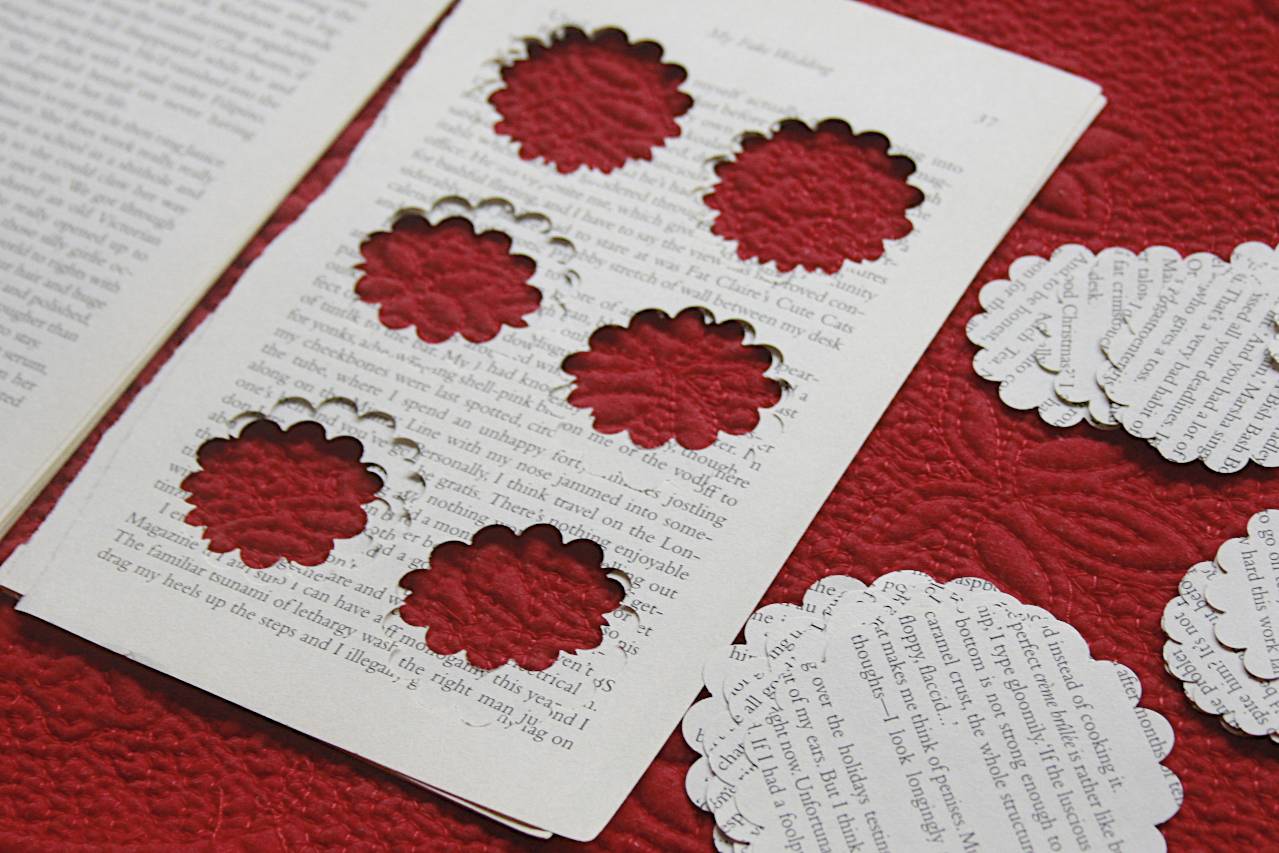
Now let's get started. You'll need scalloped punches. I used a 1.75" scallop punch from Stampin' Up {love their new punch style} and a 3" scallop punch from Paper Shapers.
And now search for a book that you no longer love. As an alternative, visit your local thrift shop and get one there. You'll need 10 punched shapes for each flower.

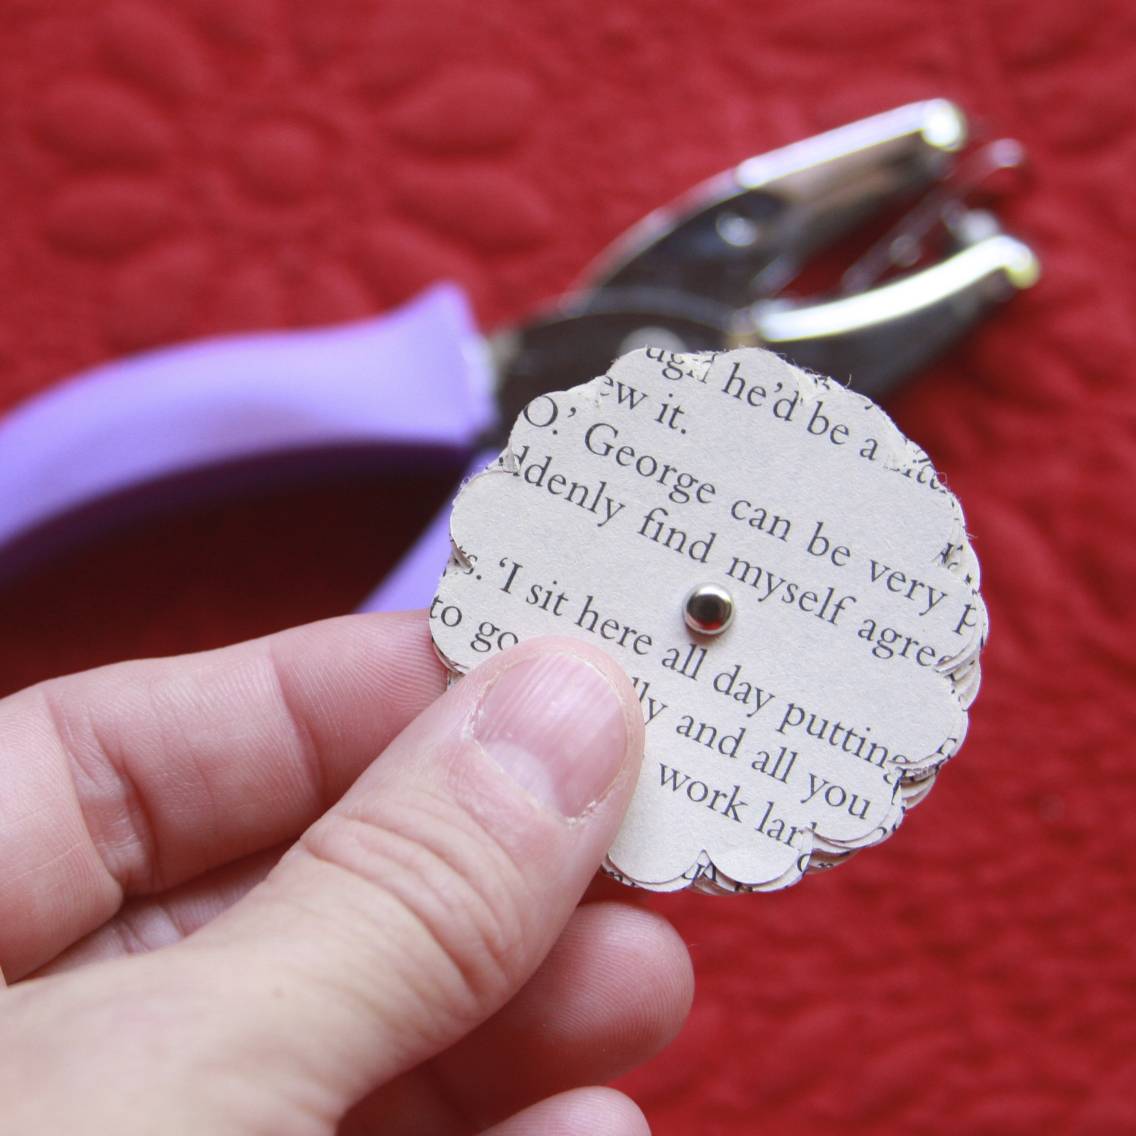
Next you'll use your Fiskars 1/16" hole punch. When my bestest gal Patty gave this to me, I had no idea what I would do with a hole that small. Now I know that it's for brads. I wouldn't mind having one of the long reach handled models, too. I had to use my paper piercer to punch the brad hole in the 3" scallops. This would be a good time to use your least favorite brad colors as the brad will not be seen when we're finished.


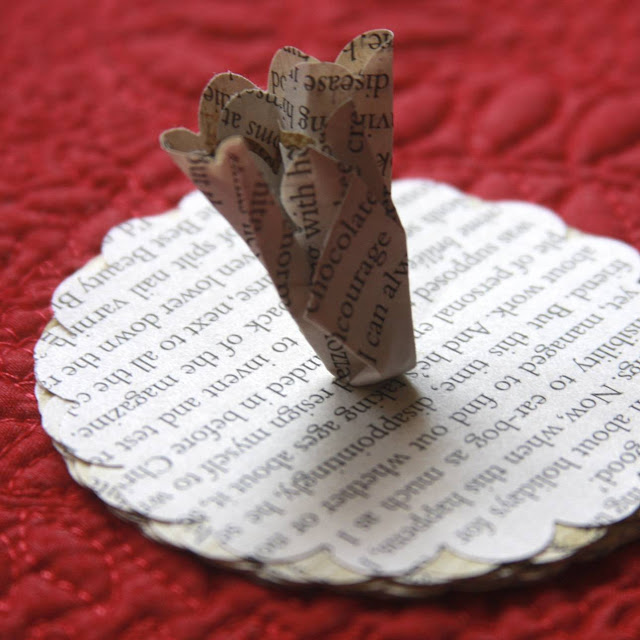
Now we'll gather up each of the ten layers and scrunch them, one by one. Pay close to these technical terms, they're confusing.
After one scrunch:

After 5 layers are scrunched:

We're almost there!

Voila! Ta Da! Fertig!

The last four photos are of the 3" scallop. I lightly brushed each of the book pages with ink before punching the scallops. This is best done with one of your old, nearly dried out ink pads so that the page is not saturated. You'll want just a hint of color. It adds a vintage touch I think. The first photo in the post is without the ink-brushed pages.
Here's an updated Paper Flower Tutorial, if you want more detailed photos.


This flower is absolutely amazing. I can't wait to get started and make a million for myself! LOL Thanks for sharing!
ReplyDeleteThanks for the tutorial - it's such a cute flower and much easier than it looks!!
ReplyDeleteCute flower...afternoon crafty activity for me and the girls.
ReplyDeletetechnical question...are all the flowers the same size?
:)
Looks like I should do more tutorials, gals. So glad you like the flower. Each of the flowers has 10 of the same size scallop punch. I never tried using two different sizes in one flower, or fewer petals, which might be nice, too, for a different look.
ReplyDeleteThis is awesome! I am so making some of these - love your containers & I'll make my flowers from some old Christmas storybooks from the $Tree. Thanks so much for the tutorial - and the fantastic ideas!
ReplyDeleteSo cute! There are so many things to do with old books out there this is one of the best, you can do so many things with it! Visiting from 733!
ReplyDeleteThese are just beautiful!
ReplyDeleteRidiculously cute! I love it.
ReplyDeletewow! sooo darn cute! thanks for sharing!
ReplyDeletegail
Very good! I'm constantly on the lookout for bookpage projects and I really like this one. (And you are a very funny lady, which makes reading the tutorial even better.)
ReplyDeleteI just made one and it's so cute. Thanks for the idea!
ReplyDeleteJust stumbled upon your fabulous blog! I love these flowers and will attempt them for my next party. Thanks for sharing:)
ReplyDeleteKristy
Love!!! I actually have those punches, so maybe this project was meant to be. ;) I'm visiting from Hope Studios' Tutorial Tuesday. Hope you'll stop by my blog to say hi. :)
ReplyDeleteOooh...I love this! Thanks for showing us. I collect all sorts of vintage papers. I am going to try this out. I don't have punches but I can cut a circle out pretty well. lol
ReplyDeleteLOOOOOVE this! I am featuring this fabulous tutorial under my diy ideas. Thanks for sharing! so creative!
ReplyDeleteSmart and clever and cute!!!
ReplyDeletehttp://fashionfaceandthearts.blogspot.com/
Just love this flower!
ReplyDeleteLove this tutorial! I did things a little differently though, you can see it over here: http://my-craft-diary.tumblr.com/post/25300012161
ReplyDeleteOnce again, thanks for the awesome tutorial! (:
I just found this on Pinterest. Great tutorial and they look so easy to make! Thanks for sharing!
ReplyDeleteI pinned this over a year ago, and it is still one of the most popular of my repins!! Love it.
ReplyDeleteThis comment has been removed by a blog administrator.
ReplyDeleteThis comment has been removed by a blog administrator.
ReplyDeleteYou may be wondering if there were a better way to file your taxes from the comfort of your home. Luckily, TurboTax has made it easy to file your taxes online and get the maximum tax refund. This is a great way to save time and money in filing your taxes. You just need to follow a few simple steps, just head over to the TurboTax login page, create your account, and get your taxes filed in no time.
ReplyDelete